
Ingredients:
1,000 grams bread flour (recommend brand: King Arthur)
Pro tip – substitute up to 50% of white flour with a whole grain such as whole wheat, rye, or spelt. Experiment! The proportion of whole grain:white flour is inversely related to density/fluffiness of your loaf.200 g active sourdough starter (fed 4–6 hours before use)
20 grams salt
750 grams room temperature water
Instructions:
Mixing:
In a bowl, mix the water and sourdough starter.
When is the starter ready? When it floats in water! Test a little dollop.- Combine & mix dry ingredients
Combine wet and dry ingredients with a spatula or large (of any material) spoon. Do not knead — just mix until incorporated.
Let the dough rest for 20-30 minutes (autolyse).

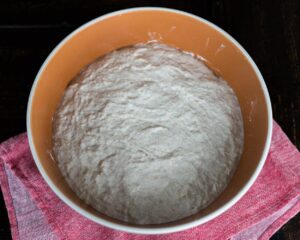
Bulk Fermentation:
Let the dough rise at room temperature for 4–6 hours until it roughly doubles in size. Fold dough ~ every hour. This is the first (or warm) “proof.”
- This recipe makes enough dough for two loaves. Transfer half of the dough to a shaping bowl (such as Benneton Bowl).
Cover dough with plastic wrap and place the containers in refrigerator for at least 10 hours. This is known as the “cold proof” and it is during this period that the dough takes on it’s sour flavor. The longer the cold proof, the more intense the flavor will become.
Baking:
Preheat oven to 500°F with a Dutch oven or baking stone inside.
Carefully transfer dough onto cornmeal-coated parchment paper and score the top with a sharp blade.
- Transfer the parchment paper and dough to the shallow part (the lid!) of the dutch oven, place in oven, and then cover this part of the dutch oven with the larger portion (the pot!).
Bake at 500°F for 20 minutes.
- Reduce temperature to 450°F and bake another 10 minutes.
- Remove the top of the dutch oven and bake, uncovered, for another 5-10 minutes – until the top crust is golden to dark brown|.
- Remove from oven and place the bread on a cooling rack; allow to cool for 10-20 minutes before consuming. This is important as the dough may still be cooking until fully cooled.
This recipe makes enough dough for 3 loaves of focaccia bread (9×13″ pans).
Ingredients:
1,000 grams bread flour (recommend brand: King Arthur)
Pro tip – substitute up to 50% of white flour with a whole grain such as whole wheat, rye, or spelt. Experiment! The proportion of whole grain:white flour is inversely related to density/fluffiness of your loaf.200 g active sourdough starter (fed 4–6 hours before use)
20 grams salt
750 grams room temperature water
- ~ 40 grams extra virgin olive oil
- Saunderstown Garlic Farm Organic garlic granules
- Course salt (topping)
- Dried rosemary (topping)
- Fresh sage leaves (topping)
Instructions:
Mixing:
In a bowl, mix the water and sourdough starter.
When is the starter ready? When it floats in water! Test a little dollop.- Combine & mix dry ingredients
Combine wet and dry ingredients with a spatula or large (of any material) spoon. Do not knead — just mix until incorporated.
Let the dough rest for 20-30 minutes (autolyse).
Bulk Fermentation:
Let the dough rise at room temperature for 4–6 hours until it roughly doubles in size. Fold dough ~ every hour. This is the first (or warm) “proof.”
Cover dough with plastic wrap and place the container in refrigerator for at least 10 hours. This is known as the “cold proof” and it is during this period that the dough takes on it’s sour flavor. The longer the cold proof, the more intense the flavor will become.
Final Proof & Baking:
- line a 9×13″ baking sheet (larger is ok) with parchment paper (or reusable and coat the middle section of the pan with about 15 grams (about 3 tablespoons) of olive oil.
- Place ~ 650 grams of dough in the center of the oil.
- Allow the dough to rest at room temperature for 15-20 minutes and start to spread the dough to fill the pan. This is an iterative process that may take an additional 20-45 minutes depending on the ambient temperature (tip: to speed the process, put in the oven on “bread proof” mode.
- after the dough has roughly covered the area of the pan, allow the dough to rise for another 30-60 minutes. This is the final proof. The longer you allow for this final proof, the thicker, and fluffier the bread will be. If you prefer thinner/crispier focaccia (yum!), use a shorter period of time for the final proof.
- When the final proof has completed, add toppings. The order in which the toppings and oil are added are a personal preference. Drizzler olive oil (about 15-25 grams) around the top of the dough. Add course salt, Saunderstown Garlic Farm garlic granules (or fresh garlic!) … you can use the garlic grinder, or manually crush (mortar & pestle) and then sprinkle the granules on the dough surface. Add dried or fresh rosemary, and dried or fresh sage.
- Dimple the surface of the dough and use this time (if desired) to spread the dough to fill the pan.
- Bake (convection mode is best) at 450F for about 20 minutes. The bread is done when the top is brown.
- Remove from oven and allow to cool.

